【原创】Ubuntu申请 Let’s Encrypt 免费的泛域名证书
前言
1、概要
现在主流的浏览器都已经对 SSL 给出了建议,建议所有网站都使用 SSL 协议,为了更安全的数据。
SSL 证书一般都是由 CA 证书机构颁发的。SSL 证书的作用主要就是对传输的数据进行加密,从而提高数据的安全性。
话不多说,本文将详细记录如何在 Ubuntu 服务器上使用 Certbot 申请一个通配符证书,敬请品阅!
2、相关环境
-
Ubuntu 18.04.4
-
Certbot 1.9
-
snap/snapd 2.47.1
-
SSH Client
3、注意事项
(1) 使用 ACME 的 Certbot 客户端来进行操作,其中 ACME 是 Let's Encrypt 制定规范,而 Certbot 是基于 ACME 的实现工具。
(2) 如果你是手动申请证书再手动配置证书,你可以在你任意一台服务器上申请证书,不一定是要在你正在运行网站的服务器上申请。当然,如果你需要使用 certbot 自动申请证书并自动配置完成,你就需要在你正在运行网站的服务器上申请。
(3) 建议使用 Certbot 在你的网站运行的服务器上进行申请,这样你就可以保留申请证书时相关的配置从而简单的一条命令就可以实现证书自动续期,减少因为证书过期对网站的影响。(证书都是具有有效期的,其中Let's Encrypt 申请的泛域名证书只有 3 个月有效期)
正文
1、安装准备
(1) 打开 Cerbot 的官网
https://certbot.eff.org/instructions
可以选择你的 HTTP Server 以及你的服务器的操作系统。然后下方会出现对应的安装 Certbot 及申请证书方法。
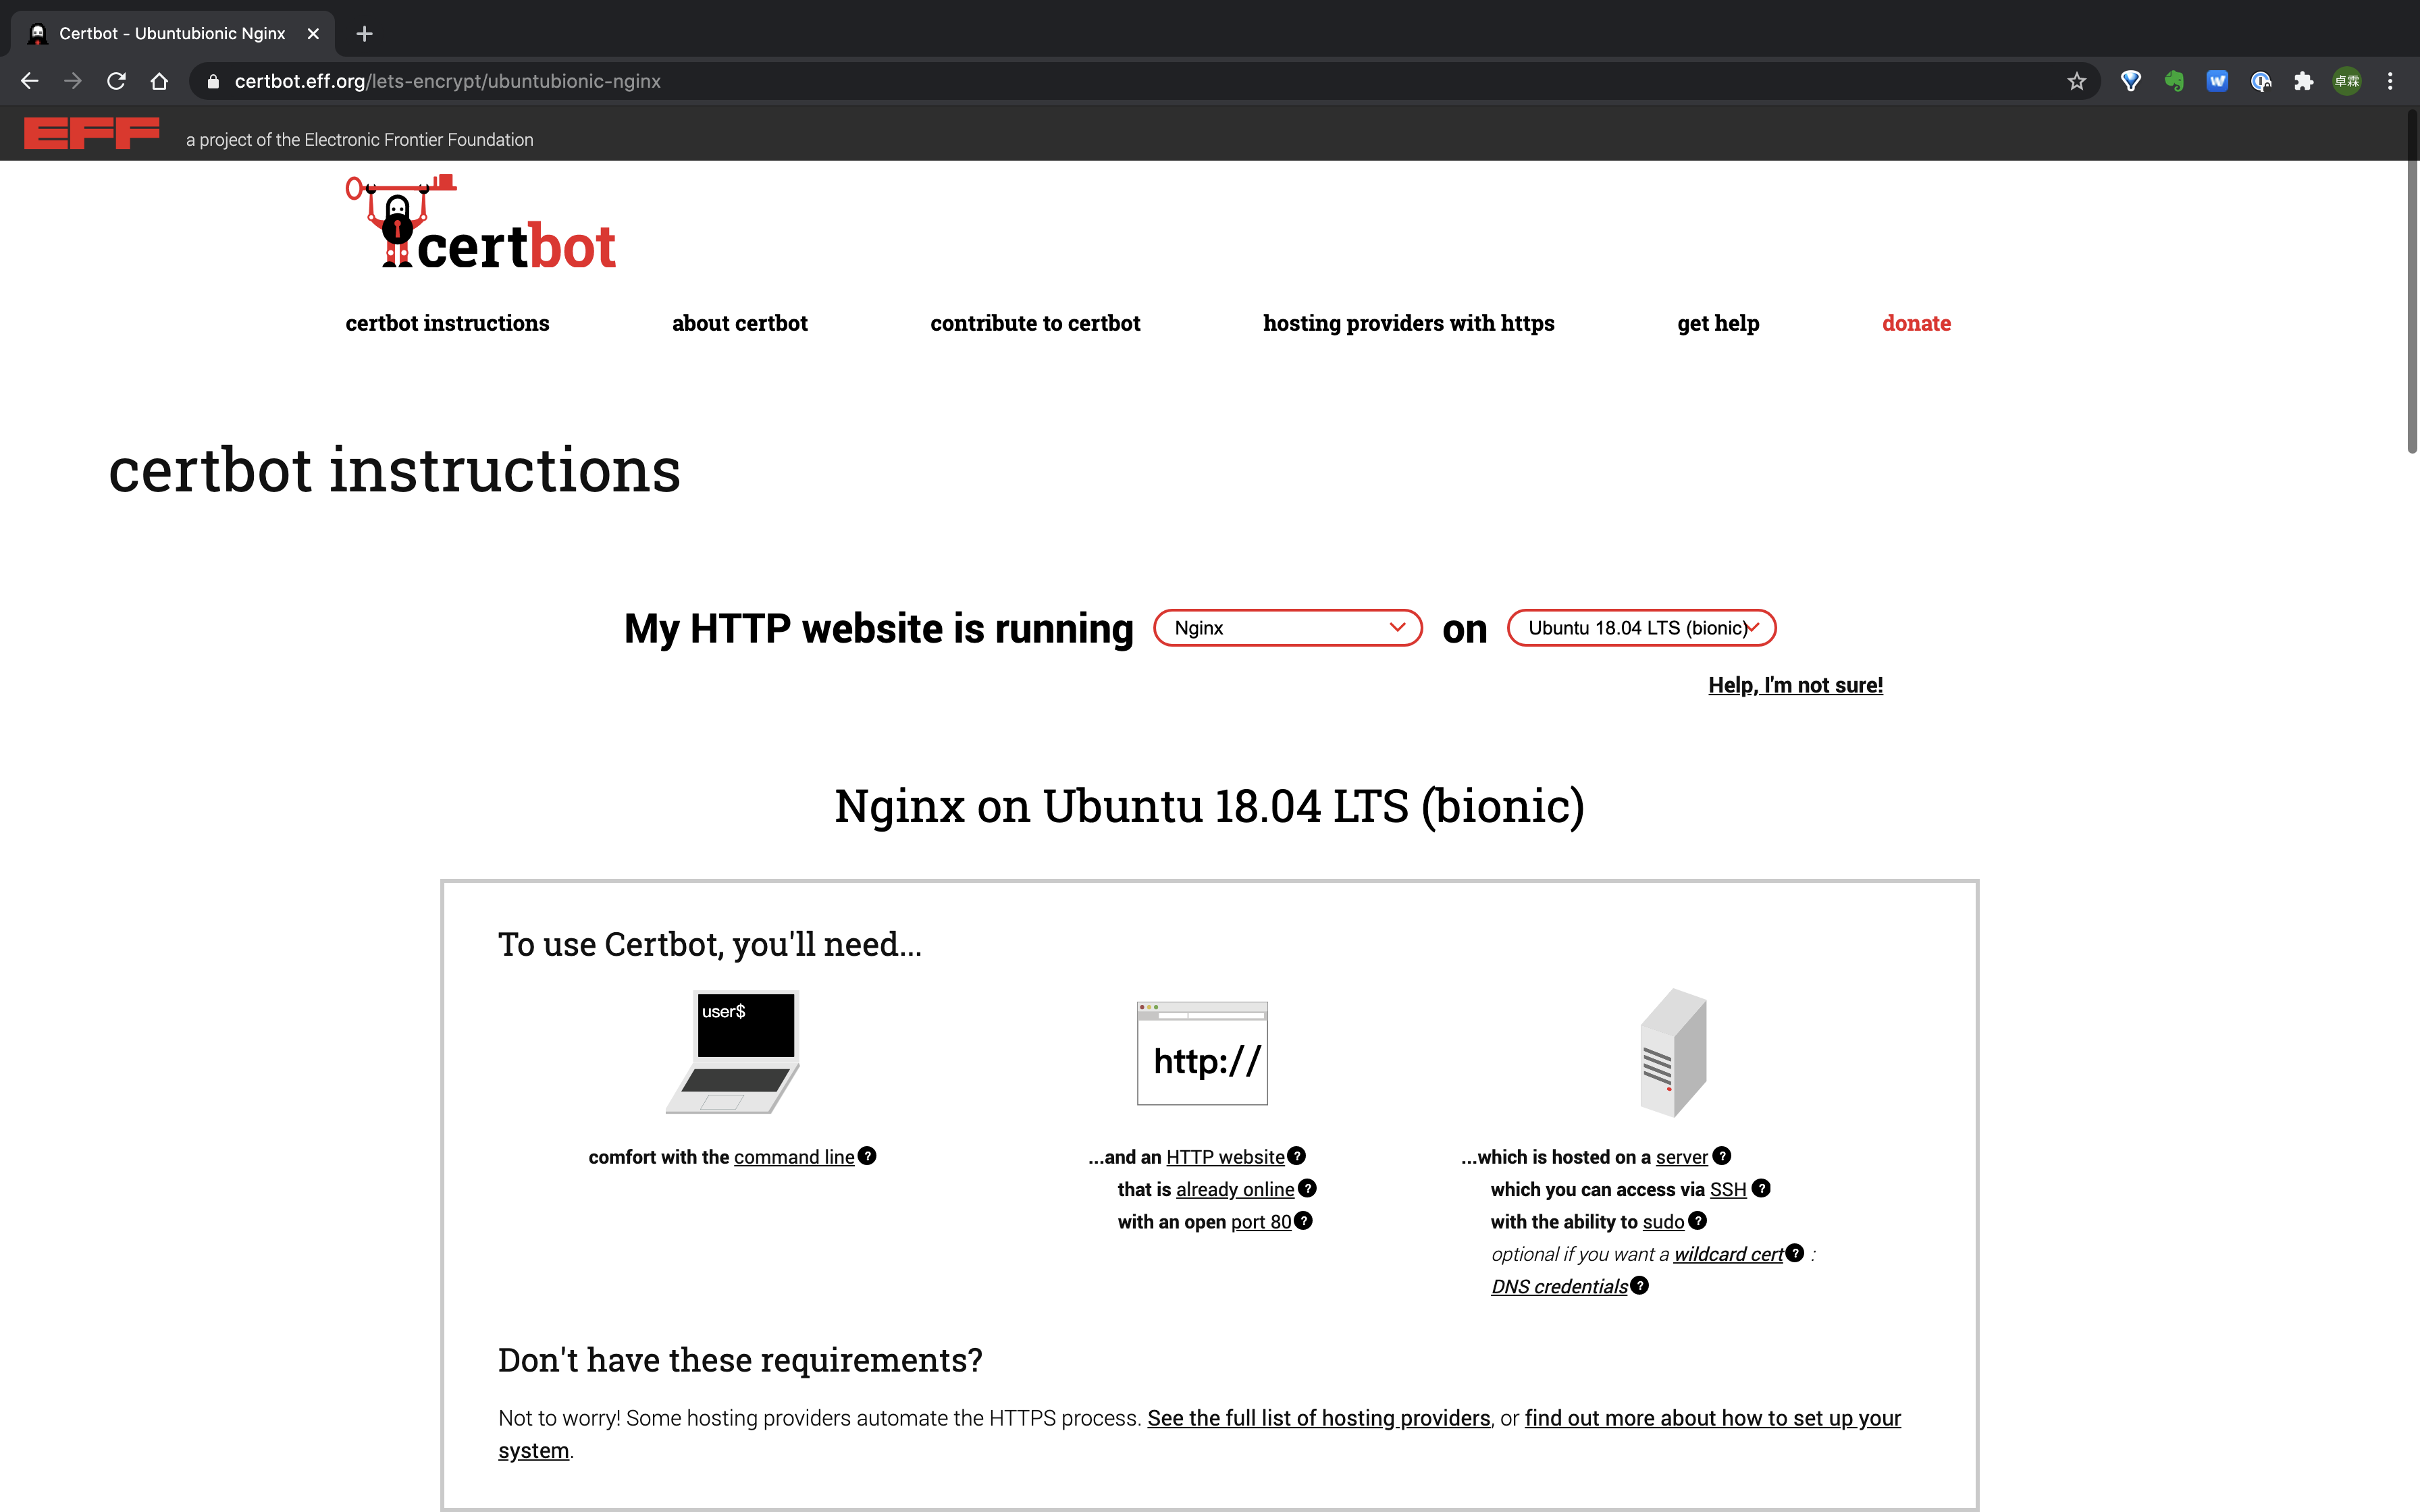
如果你的环境与我相同,那么这一步可跳过,跟着我下面的步骤走就行了。
(2) SSH 连接到你的 VPS(云服务器)
有很多 SSH Client 可以用来进行连接,如 SecureCRT,XShell,MobaX 等等。此处略。
(3) 更新 snap
注:Ubuntu 系统官方只支持使用 snap 进行安装 cerbot,snap 在 18.04 版本是默认集成的(包括 16.04 及以后的 Ubuntu 系统中都默认集成了)。参考:https://snapcraft.io/docs/installing-snap-on-ubuntu
sudo snap install core; sudo snap refresh core
示例:
$ sudo snap install core; sudo snap refresh core
2020-11-03T18:02:01Z INFO Waiting for automatic snapd restart...
core 16-2.47.1 from Canonical✓ installed
snap "core" has no updates available
如果你的 Ubuntu 没有 snap,可以使用如下命令安装
sudo apt install -y snapd
2、安装 Certbot
执行如下命令即可安装 Certbot
sudo snap install --classic certbot
示例:
$ sudo snap install --classic certbot
certbot 1.9.0 from Certbot Project (certbot-eff✓) installed
将 certbot 链接到 PATH 路径中,就可以在任意位置随意食用啦~
sudo ln -s /snap/bin/certbot /usr/bin/certbot
注:如果你的系统中有使用其他包管理工具安装过 certbot,需要先进行卸载。比如:
sudo apt-get remove certbot
sudo dnf remove certbot
sudo yum remove certbot
3、验证 Certbot
在任意目录执行如下命令,如果有版本号输出,表示 certbot 已经正常啦。
$ certbot --version
certbot 1.9.0
4、确认已经安装的插件也正常
$ sudo snap set certbot trust-plugin-with-root=ok
$
如果执行有问题,需要如下步骤:
sudo snap install certbot-dns-<PLUGIN>
<PLUGIN> 换成你的 DNS 供应商,比如:
sudo snap install certbot-dns-cloudflare
5、插件选择
这一步你可以选择使用 DNS 插件或者 HTTP Server 插件,这样就能够自动申请好证书并配置好 SSL 相关的凭证。当然也可以手动获取证书再自己手动设置凭证。
https://certbot.eff.org/docs/using.html#getting-certificates-and-choosing-plugins
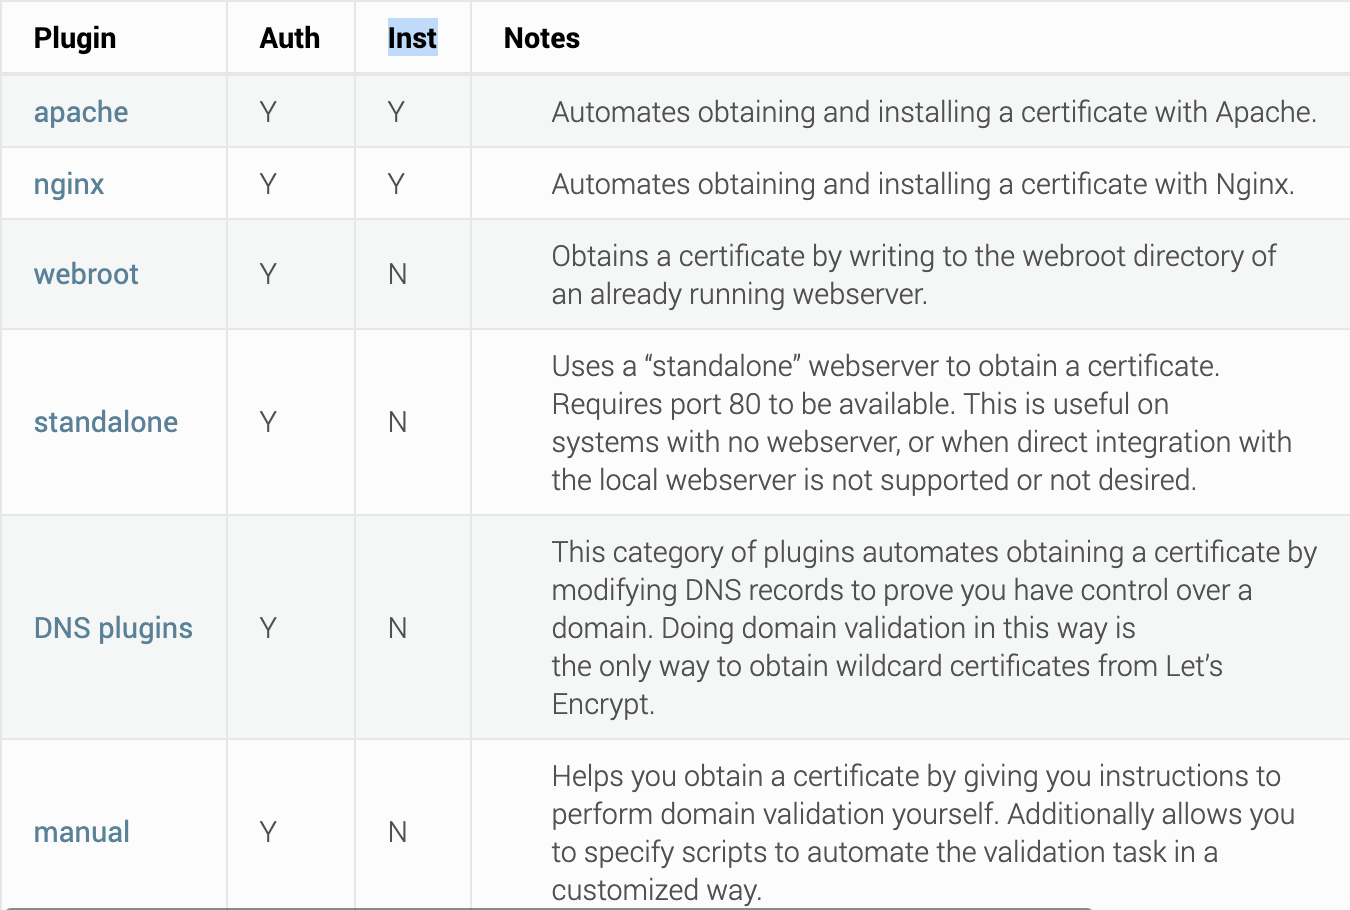
这里不选择插件,使用手动方式。 请看下一步~
6、申请证书命令解析
手动申请证书也是相当简单的,只需要执行下面的一条命令即可开始申请证书了
certbot certonly -d '*.zhuolin.xyz' --manual --preferred-challenges dns
参数说明:
(1) certbot 命令就是上面安装 certbot 工具,它的作用就是用来处理证书相关的操作。certbot 的详细命令解释可以使用 certbot -h 进行查看。
(2) certonly 是 certbot 的其中一个子命令,表示的是只申请证书或者续期一个证书,但不安装它。还有两个类似的子命令是 run 表示申请证书同时安装它;renew 表示续期之前在当前机器上申请的所有已过期的证书。
(3) -d 参数对应 domain 的首字母,表示后面是要申请证书的域名,多个域名用逗号分隔,如 -d blog.zhuolin.xyz,www.zhuolin.xyz,forum.zhuolin.xyz。
(4) --manual 指定使用的插件,可参考上面步骤。
(5) --preferred-challenges 参数指定用于域名确认的方式,我这里申请的是泛域名,所以只能写 dns。
(6) 还可以通过 --server 参数来指定证书签发的 ACME 服务器,默认情况下使用的是 Let's Encrypt 的生产服务器 https://acme-v02.api.letsencrypt.org/,不用配置。
https://certbot.eff.org/docs/using.html#changing-the-acme-server

7、申请过程示例
申请证书过程详见下方示范过程:
$ sudo certbot certonly -d '*.zhuolin.xyz' --manual --preferred-challenges dns    (1) 输入命令
[sudo] password for jiangzl:    (2) 输入用户密码获取 sudo 权限
Saving debug log to /var/log/letsencrypt/letsencrypt.log
Plugins selected: Authenticator manual, Installer None
Enter email address (used for urgent renewal and security notices)
(Enter 'c' to cancel): your_email@domain.com   (3) 输入你的邮箱地址,联系你用的
- - -
- - - - - - - - - - - - - - - - - - - - - - - - - - - - - - - - - - - - - - - -
Please read the Terms of Service at
https://letsencrypt.org/documents/LE-SA-v1.2-November-15-2017.pdf. You must
agree in order to register with the ACME server at
https://acme-v02.api.letsencrypt.org/directory
- - - - - - - - - - - - - - - - - - - - - - - - - - - - - - - - - - - - - - - -
(A)gree/(C)ancel: A    (4) 同意 ACME 的条款,只能写 A,不然就申请不了...
- - - - - - - - - - - - - - - - - - - - - - - - - - - - - - - - - - - - - - - -
Would you be willing, once your first certificate is successfully issued, to
share your email address with the Electronic Frontier Foundation, a founding
partner of the Let's Encrypt project and the non-profit organization that
develops Certbot? We'd like to send you email about our work encrypting the web,
EFF news, campaigns, and ways to support digital freedom.
- - - - - - - - - - - - - - - - - - - - - - - - - - - - - - - - - - - - - - - -
(Y)es/(N)o: N    (5) 问你是否愿意接收 Let's Encrypt 及其伙伴的推广邮件啥的,填 N
Obtaining a new certificate
Performing the following challenges:
dns-01 challenge for zhuolin.xyz
- - - - - - - - - - - - - - - - - - - - - - - - - - - - - - - - - - - - - - - -
NOTE: The IP of this machine will be publicly logged as having requested this
certificate. If you're running certbot in manual mode on a machine that is not
your server, please ensure you're okay with that.
- - - -
Are you OK with your IP being logged?
- - - - - - - - - - - - - - - - - - - - - - - - - - - - - - - - - - - - - - - -
(Y)es/(N)o: Y  (6)这里问你申请这个证书的机器 IP 将会被公开记录,有问题没?没问题,不影响在其他机器上使用
- - - - - - - - - - - - - - - - - - - - - - - - - - - - - - - - - - - - - - - -
Please deploy a DNS TXT record under the name
_acme-challenge.zhuolin.xyz with the following value:
AUsIXEQX54x9Oas15t5fg58-xxx
- - - -
Before continuing, verify the record is deployed.    (7) 让你先去 DNS 托管处配置一个 TXT 的解析
- - - - - - - - - - - - - - - - - - - - - - - - - - - - - - - - - - - - - - - -
Press Enter to Continue    (8) 一定要确保第 7 步完成且成功后再按 Enter
注:在按 Enter 键继续之前,需要先配置 DNS 的解析,请参考下面内容。
---------------->>>>>>> 域名确认开始 <<<<<<<----------------
-
思想准备...
使用 certbot 手动申请证书会有一个域名确认的过程,这也是为了确认该域名确实为你所有,而不是别人随意知道你的域名就把证书给申请了。
https://certbot.eff.org/docs/using.html#manual
所以确认也是必要的。有两个确认方法:
第一种是在你的域名的 DNS 解析中添加一条指定的 text 解析,解析规则由 Certbot 申请完成时给出。
第二种是通过 http 的方式确认,就是在你的网站根目录放一个文本文件,这个文件也是由 Certbot 给出。
注:泛域名的证书只能使用第一种 DNS 解析确认,这里也对应于上面 --preferred-challenges dns
-
操作过程
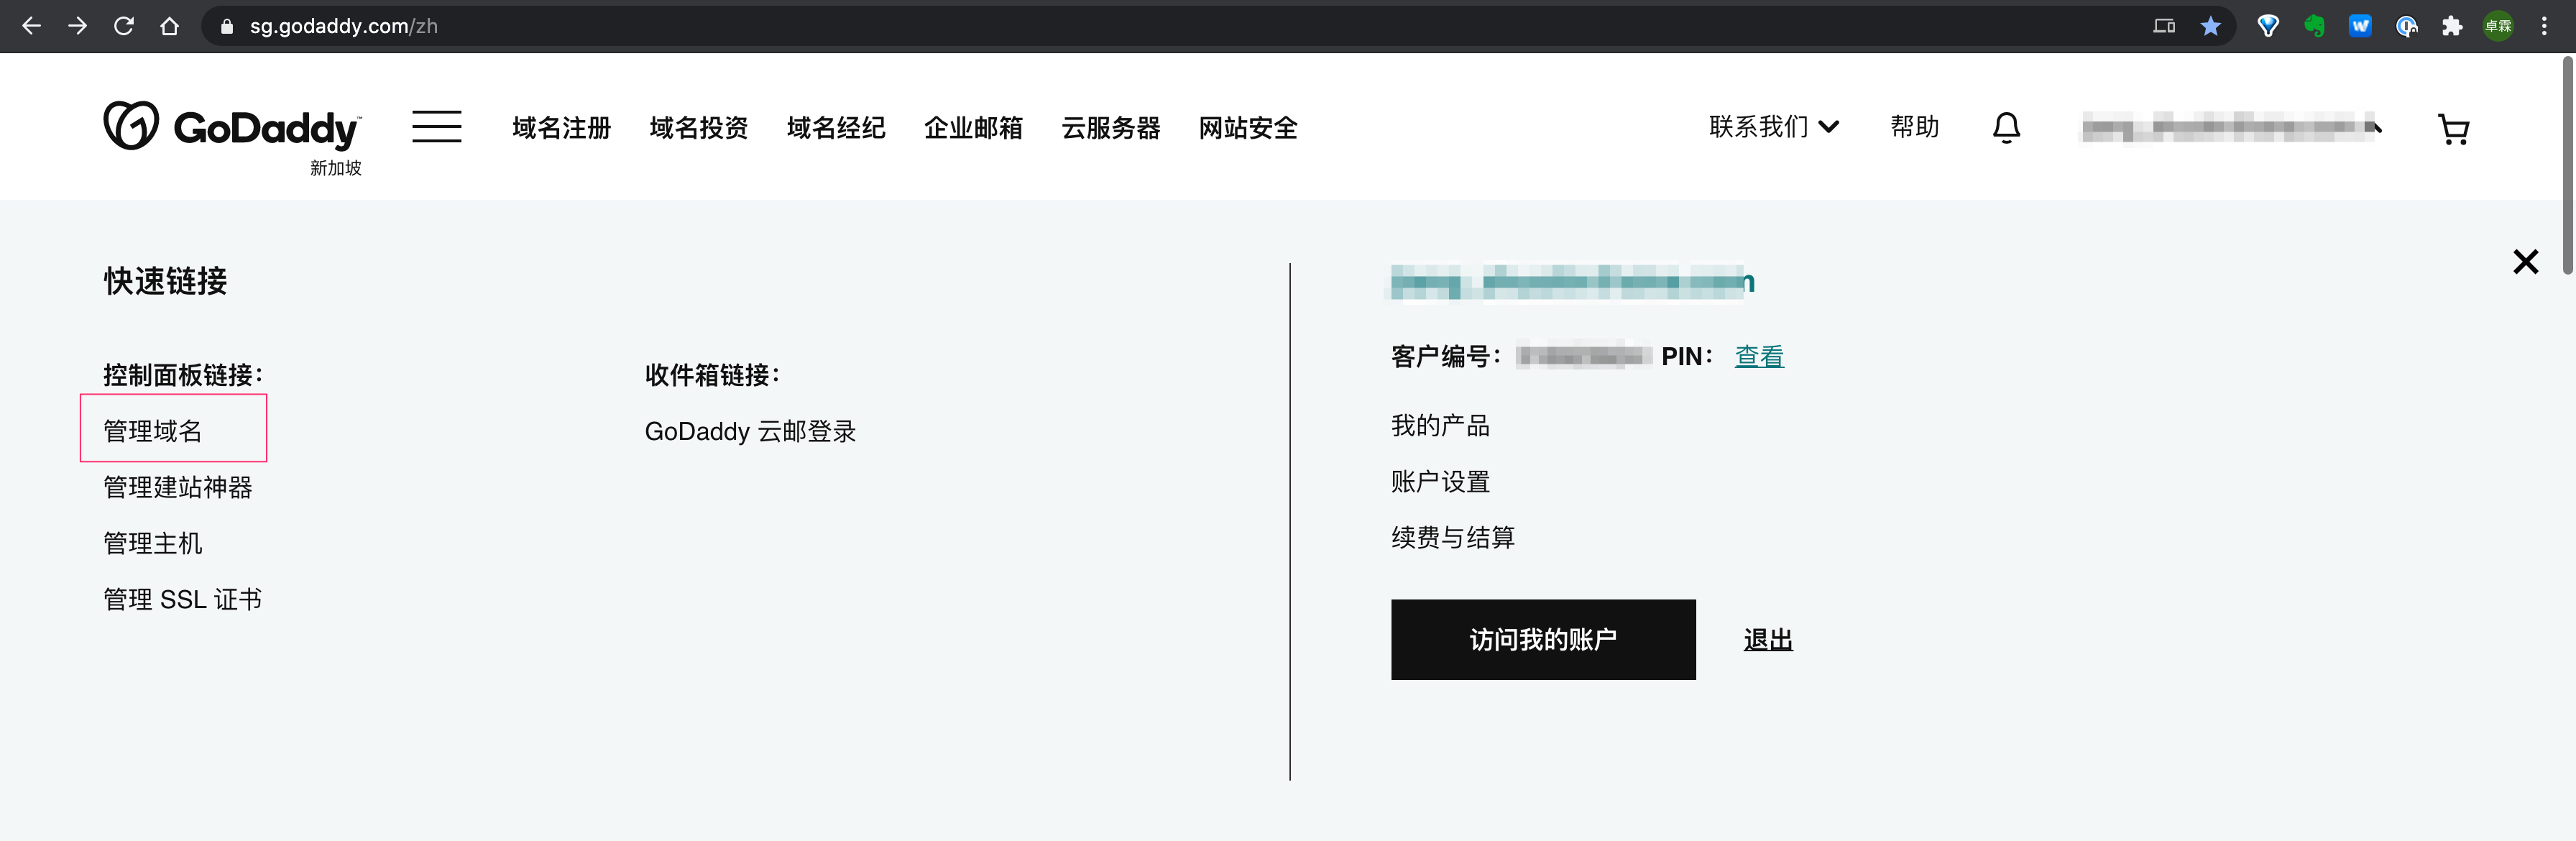
在域名托管商的 DNS 解析面板将下面的记录解析到 AUsIXEQX54x9Oas15t5fg58-xxx,下面以我的 GoDaddy 的设置为例,其他域名托管商的设置都类似。
_acme-challenge.zhuolin.xyz
登录 GoDaddy 账号后,点击右上角的账户名,然后在展开的二级菜单中选择 "管理域名" 即可进入域名管理页面。(或者登录后直接在浏览后输入 https://dcc.godaddy.com/domains 也可以进入域名管理页面)
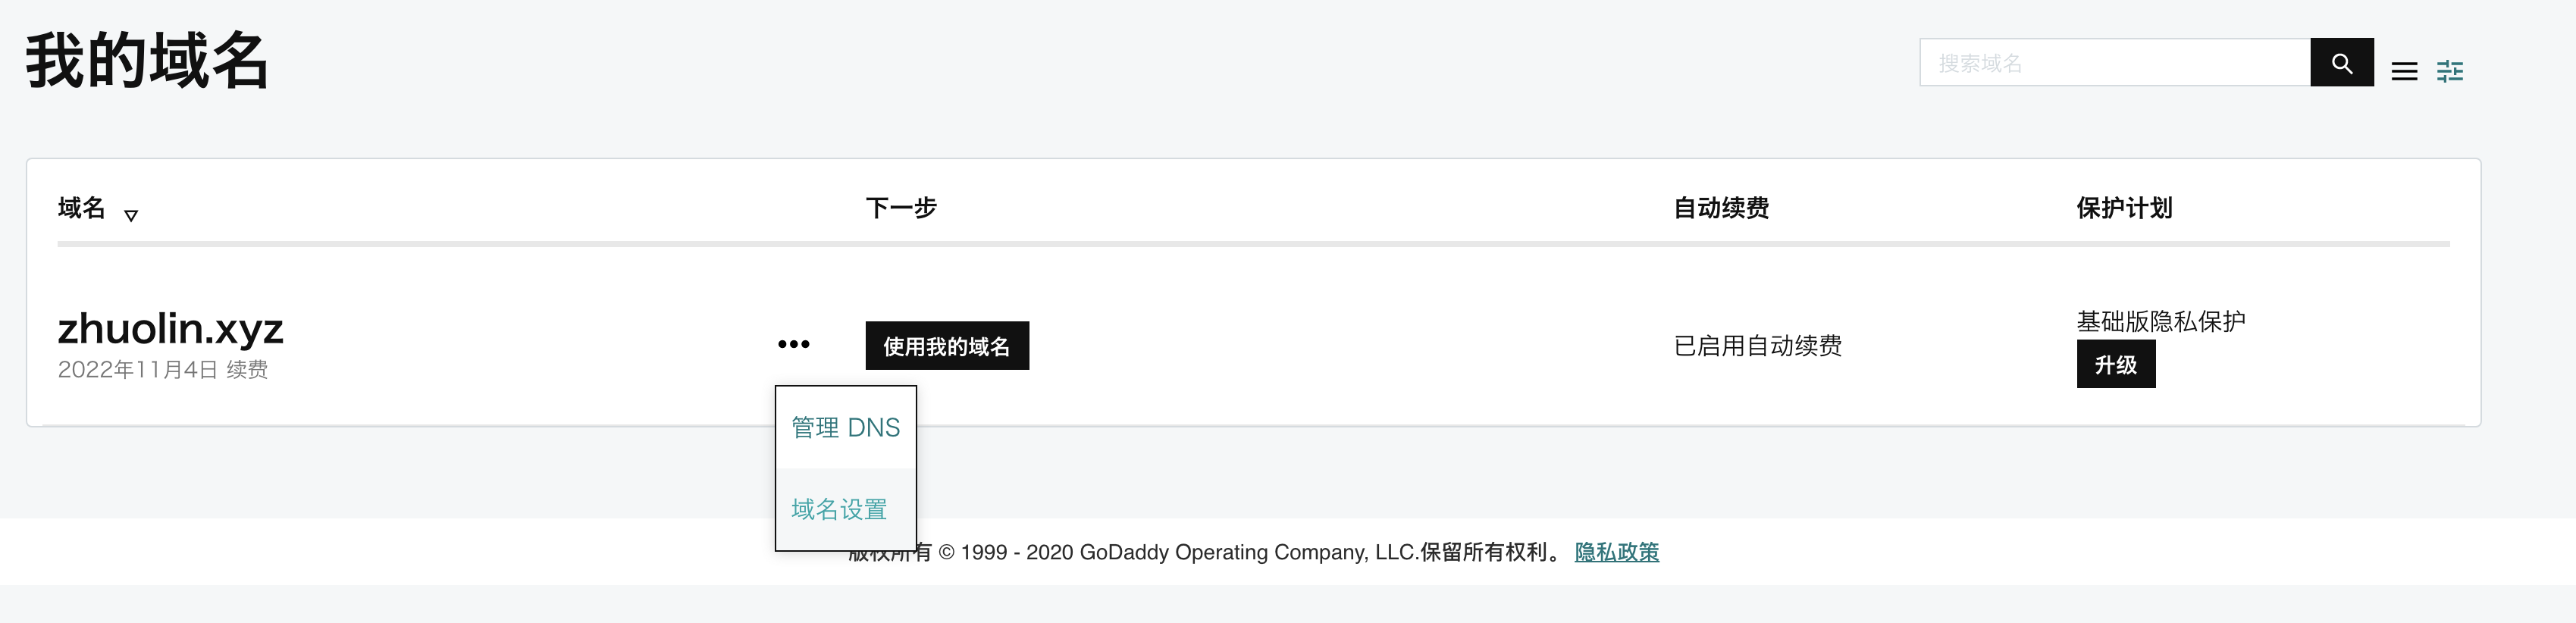
在 "我的域名" 页面,点击 "三个点" -> "管理 DNS" 即可进入 DNS 解析页面
点击 "添加" 添加一条 DNS 解析记录
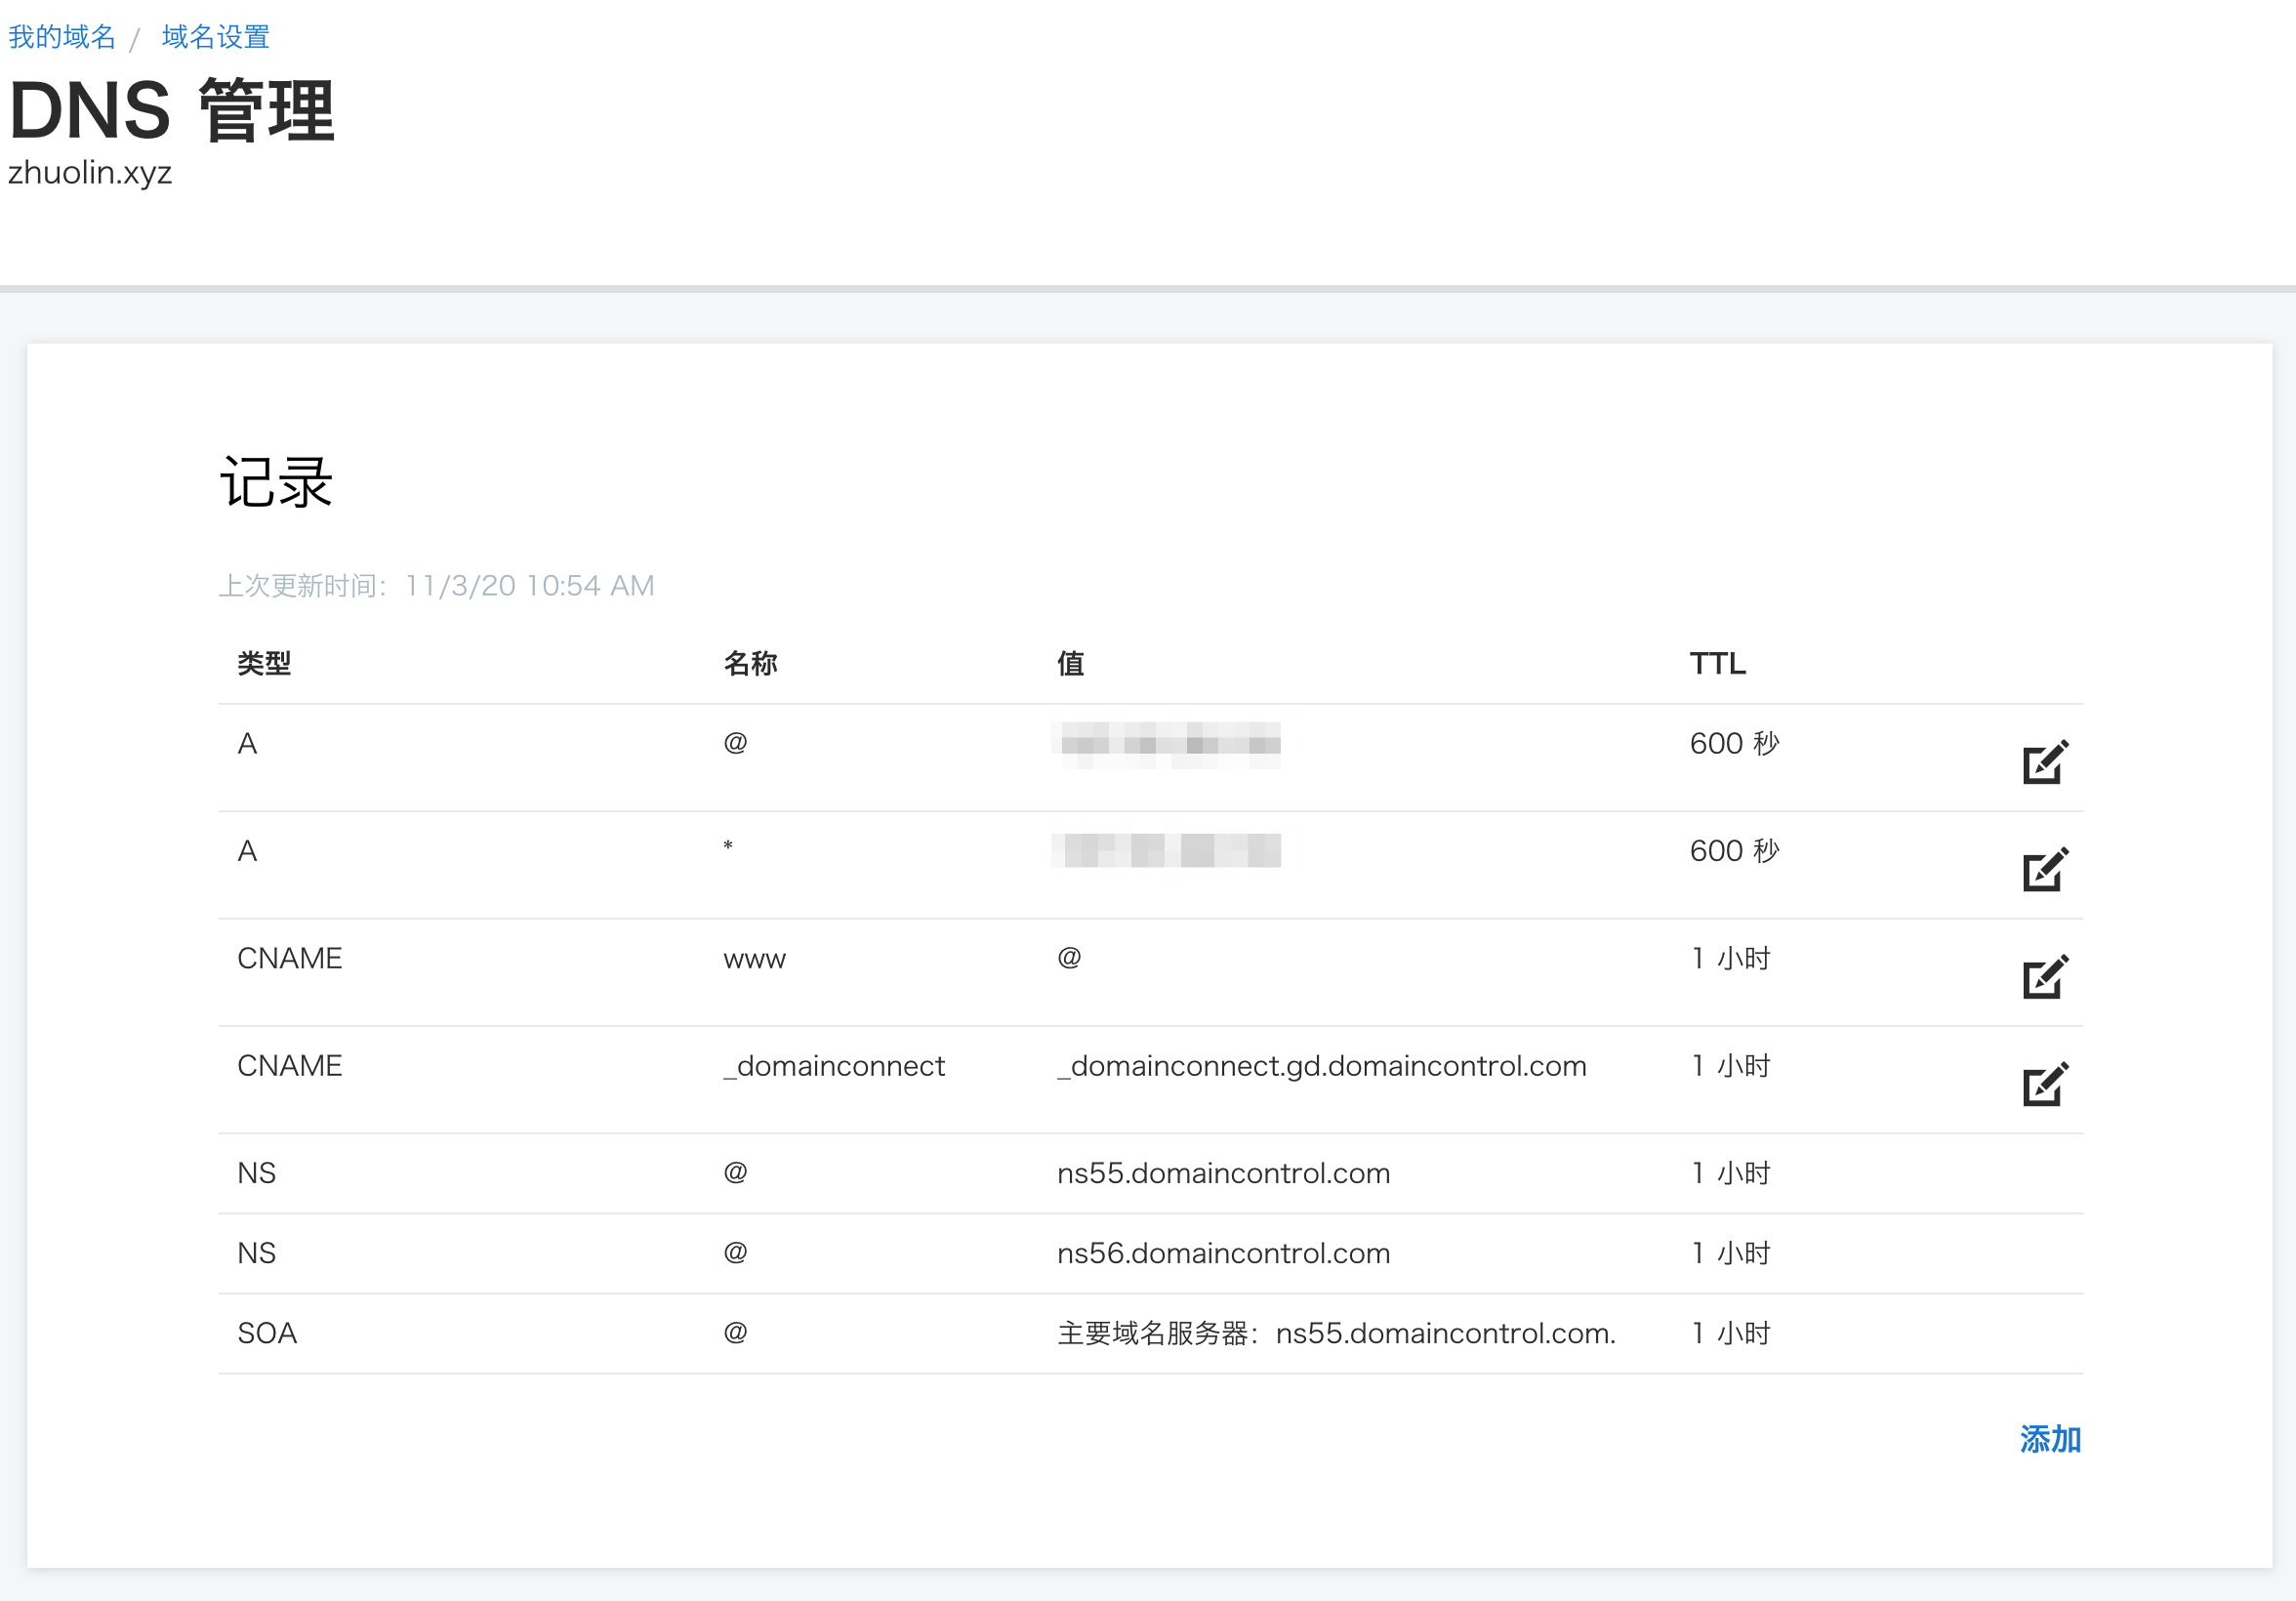
填写控制台输出的信息,然后点击 "保存"
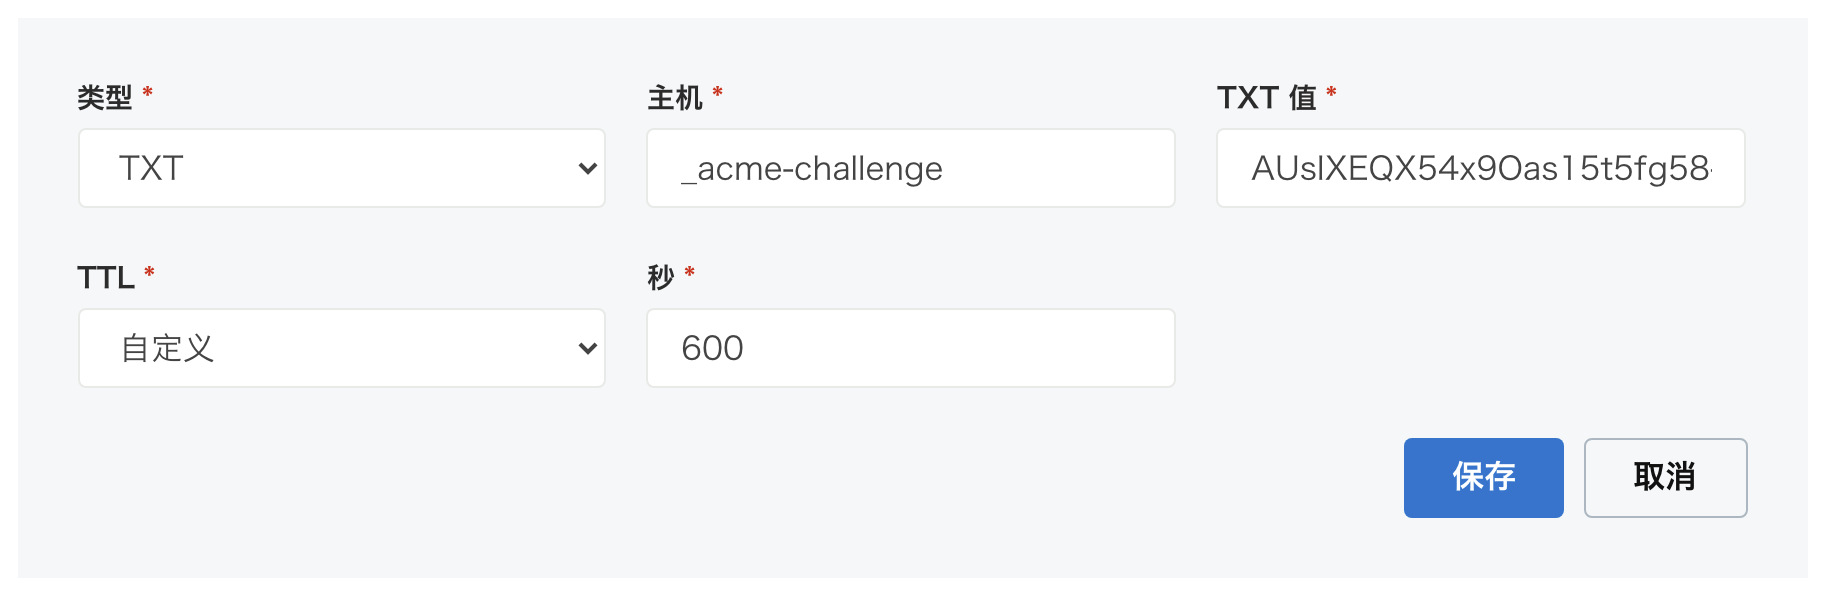
注意,类型必须选 TXT,主机填控制台中给你的域名前面那部分,如: _acme-challenge(控制台给的: _acme-challenge.zhuolin.xyz),TXT 值就填控制台的那个 TOKEN 值,如: AUsIXEQX54x9Oas15t5fg58-xxx 后面部分被我省略了...
保存后,一般 DNS 的解析延迟默认都是 10 分钟,但有可能少于 10 分钟,所以可以进行验证。
$ dig -t txt  _acme-challenge.zhuolin.xyz
; <<>> DiG 9.10.6 <<>> -t txt _acme-challenge.zhuolin.xyz
;; global options: +cmd
;; Got answer:
;; ->>HEADER<<- opcode: QUERY, status: NOERROR, id: 59710
;; flags: qr rd ra; QUERY: 1, ANSWER: 1, AUTHORITY: 0, ADDITIONAL: 0
;; QUESTION SECTION:
;_acme-challenge.zhuolin.xyz.   IN      TXT
;;
;; ANSWER SECTION:
_acme-challenge.zhuolin.xyz. 600 IN TXT "AUsIXEQX54x9Oas15t5fg58-xxx"
;;
;; Query time: 252 msec
;; SERVER: 192.168.0.1#53(192.168.0.1)
;; WHEN: Wed Nov 04 03:08:27 CST 2020
;; MSG SIZE rcvd: 101
如果上面显示 QERRY: 1,ANSWER: 0,就表示还没生效,得等几分钟时间。如果是 QERRY: 1,ANSWER: 1 就表示生效了。 如果没生效是查不到下面的 ANSWER SECTION 内容的。
---------------->>>>>>> 域名确认结束 <<<<<<<----------------
接上面,成功验证后再按 Enter 键,基本就完成了。
Press Enter to Continue (8) 这里接上面的 8,一定要确保第 7 步的域名确认过程完成且成功后再按 Enter
Waiting for verification...
Cleaning up challenges
IMPORTANT NOTES:
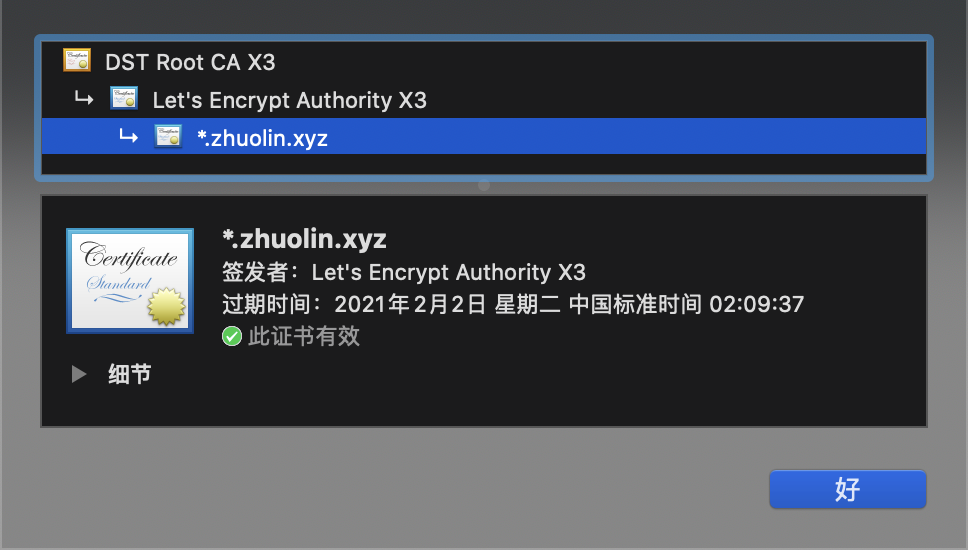
- Congratulations! Your certificate and chain have been saved at:
/etc/letsencrypt/live/zhuolin.xyz/fullchain.pem
Your key file has been saved at:
/etc/letsencrypt/live/zhuolin.xyz/privkey.pem
Your cert will expire on 2021-02-01. To obtain a new or tweaked
version of this certificate in the future, simply run certbot
again. To non-interactively renew *all* of your certificates, run
"certbot renew"
- Your account credentials have been saved in your Certbot
configuration directory at /etc/letsencrypt. You should make a
secure backup of this folder now. This configuration directory will
also contain certificates and private keys obtained by Certbot so
making regular backups of this folder is ideal.
- If you like Certbot, please consider supporting our work by:
# # # # # # # # # # # # # # # # # # # # # # # #
Donating to ISRG / Let's Encrypt: https://letsencrypt.org/donate
Donating to EFF: https://eff.org/donate-le
从上面的信息可以看出:
(1) 证书已经生成好了,公钥:/etc/letsencrypt/live/zhuolin.xyz/fullchain.pem,私钥: /etc/letsencrypt/live/zhuolin.xyz/privkey.pem,下载保存吧~
$ pwd
/etc/letsencrypt/live/zhuolin.xyz
$ ll
total 12
drwxr-xr-x 2 root root 4096 Nov  3 19:09 ./
drwx------ 3 root root 4096 Nov  3 19:09 ../
lrwxrwxrwx 1 root root   35 Nov  3 19:09 cert.pem -> ../../archive/zhuolin.xyz/cert1.pem
lrwxrwxrwx 1 root root   36 Nov  3 19:09 chain.pem -> ../../archive/zhuolin.xyz/chain1.pem
lrwxrwxrwx 1 root root   40 Nov  3 19:09 fullchain.pem -> ../../archive/zhuolin.xyz/fullchain1.pem
lrwxrwxrwx 1 root root   38 Nov  3 19:09 privkey.pem -> ../../archive/zhuolin.xyz/privkey1.pem
-rw-r--r-- 1 root root  692 Nov  3 19:09 README
(2) 这个证书的有效期只有 3 个月,所以我们还需要有一个重新签发的脚本,让它到期自动运行并进行签发。
(3) 这个证书可以使用在其他的服务器上,不受 IP 限制。
(4) 完成证书申请后就可以将域名确认的那条 TXT 的 DNS 解析删除啦,虽然不删也影响不大的~
8、续签证书
使用 certbot renew 进行重新签发,未过期的证书不会延期
$ sudo certbot renew
Saving debug log to /var/log/letsencrypt/letsencrypt.log
- - - - - - - - - - - - - - - - - - - - - - - - - - - - - - - - - - - - - - - -
Processing /etc/letsencrypt/renewal/zhuolin.xyz.conf
- - - - - - - - - - - - - - - - - - - - - - - - - - - - - - - - - - - - - - - -
Cert not yet due for renewal
- - - - - - - - - - - - - - - - - - - - - - - - - - - - - - - - - - - - - - - -
The following certs are not due for renewal yet:
  /etc/letsencrypt/live/zhuolin.xyz/fullchain.pem expires on 2021-02-01 (skipped)
No renewals were attempted.
- - - - - - - - - - - - - - - - - - - - - - - - - - - - - - - - - - - - - - - -
设置 crontab 定时任务
$ sudo crontab -e
00 0 * * * certbot renew --deploy-hook "service nginx reload"
9、Nginx WordPress 配置 SSL 示例
server{
        listen       80;
        server_name  blog.zhuolin.xyz;
        #force redirect http to https
        #rewrite ^ https://$http_host$request_uri?permanent;
        rewrite ^(.*) https://$host$1 permanent;
}
server {
        listen       443 ssl http2 default_server;
        listen       [::]:443 ssl;
        server_name  blog.zhuolin.xyz;
        charset utf-8;
        index  index.php index.html index.htm;
        # # # # #
location / {
proxy_pass http://127.0.0.1:8080;
proxy_set_header Host $host;
proxy_set_header X-Real-IP $remote_addr;
proxy_set_header REMOTE-HOST $remote_addr;
proxy_set_header X-Forwarded-For $proxy_add_x_forwarded_for;
proxy_redirect http:// $schema://;
}
rewrite /wp-admin$ $scheme://$host$uri/ permanent;
# ssl config start
ssl_certificate /etc/letsencrypt/live/zhuolin.xyz/fullchain.pem;
ssl_certificate_key /etc/letsencrypt/live/zhuolin.xyz/privkey.pem;
ssl_session_cache shared:SSL:1m;
ssl_session_timeout 10m;
ssl_ciphers HIGH:!aNULL:!MD5;
ssl_prefer_server_ciphers on;
# ssl config end
# # # # #
error_page 404 /custom_404.html;
location = /custom_404.html {
root /usr/share/nginx/html;
internal;
}
# # # # #
error_page 500 502 503 504 /custom_50x.html;
location = /custom_50x.html {
root /usr/share/nginx/html;
internal;
}
# # # # #
access_log /var/log/nginx/blog.zhuolin.com_access.log;
error_log /var/log/nginx/blog.zhuolin.com_error.log;
}
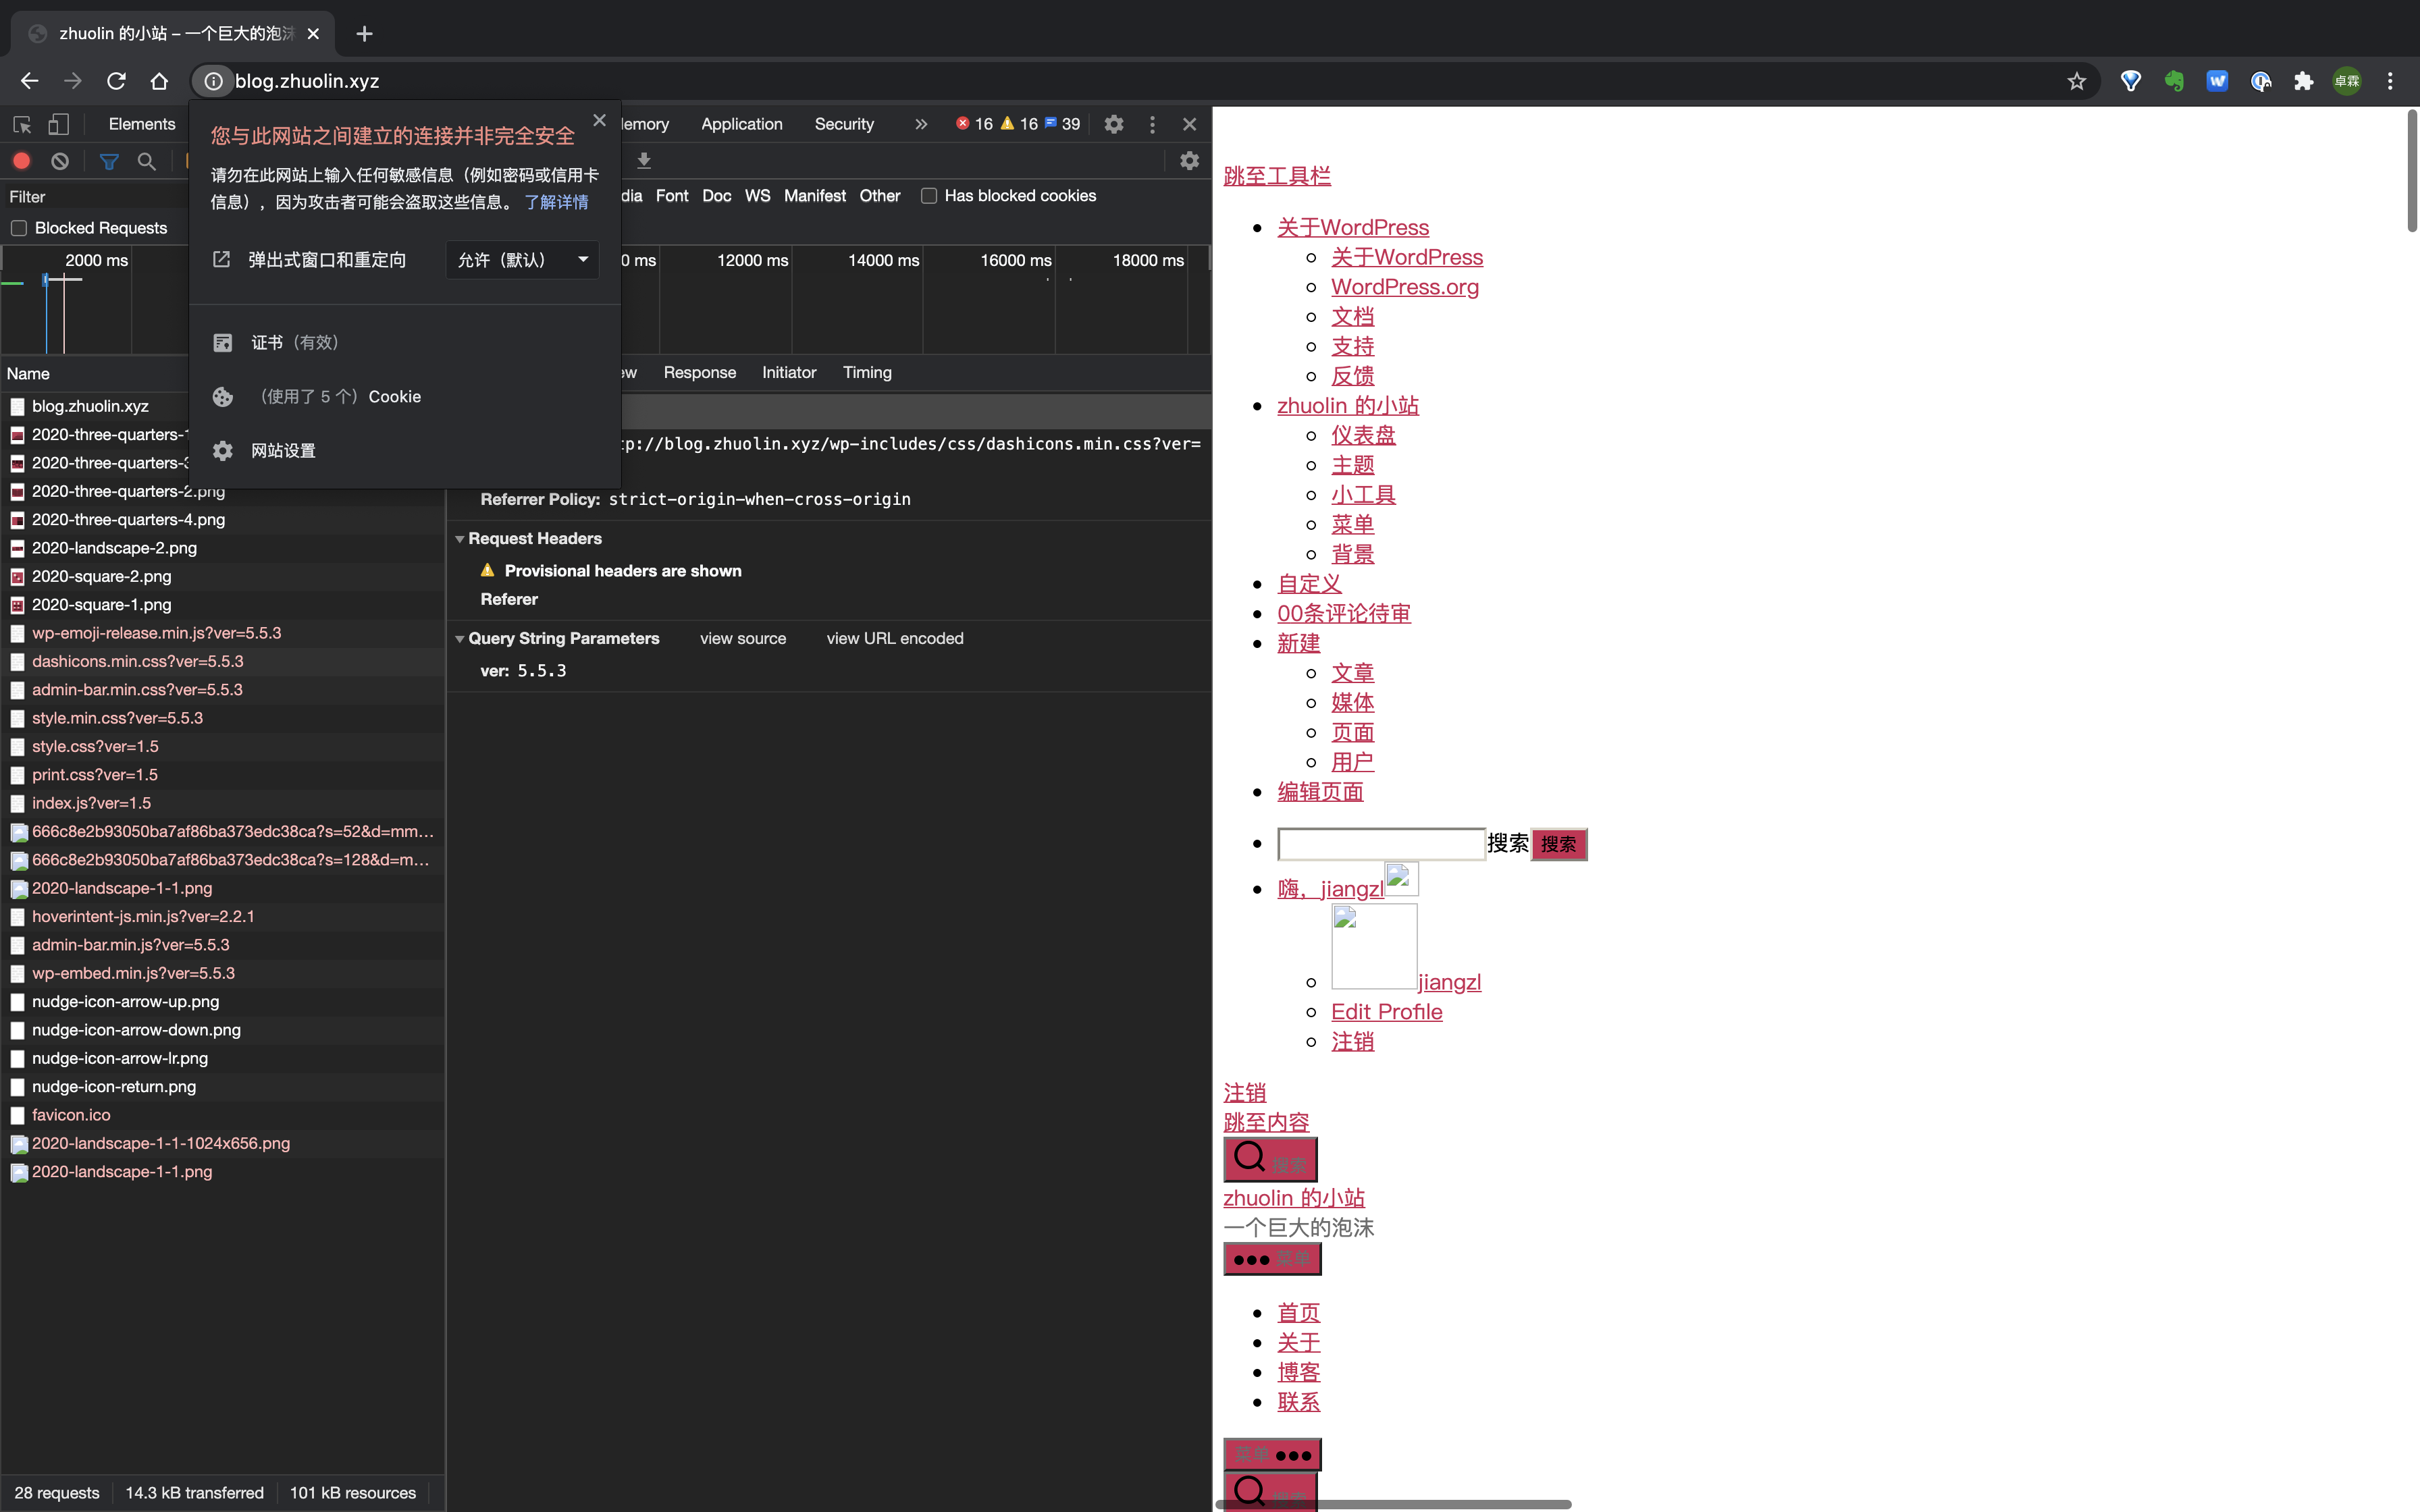
10、打开网站验证吧
可以看到,成功啦!
总结
本文算是比较详细地记录了申请 SSL 证书的过程了。不过如果你还需要给你的 WordPress 配置 SSL,可以配合插件 Really Simple SSL 插件使用~
如果这篇文章对你有所帮助,烦请给我一个小小的赞,你的支持是我创作优质内容的最大动力~
附录
官网
https://letsencrypt.org
文档中心
https://letsencrypt.org/docs/
参考:
https://www.cnblogs.com/wzlinux/p/11188454.html

近期评论