【原创】开始使用 Vagrant
概要
1、Vagrant 简介
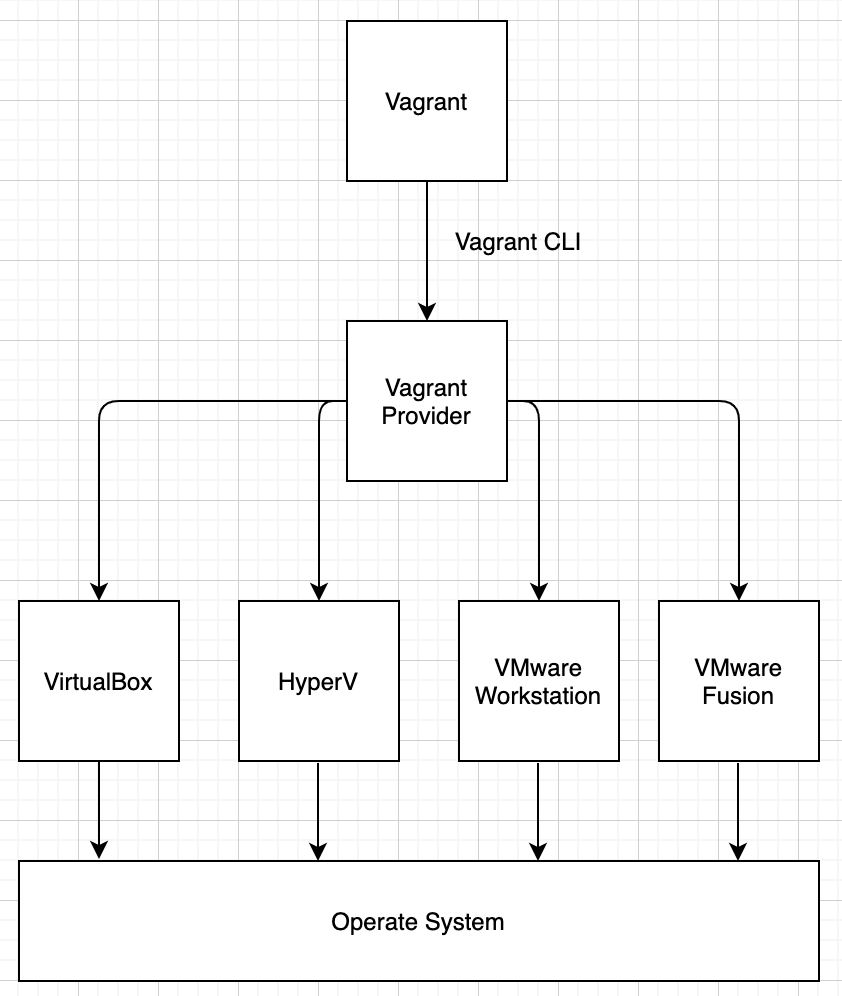
Vagrant 是一个构建与管理虚拟环境的工具,但它本身并不是一个虚拟化工具。因此,它不能提供虚拟化功能,你需要有安装好的对应平台的虚拟化工具,然后使用对应的 Provider 驱动工具进行 Vagrant 与虚拟化工具的连接,然后你就可以通过 Vagrant 来方便地管理与使用虚拟环境了。
以下的 Vagrant 简易的运行流程图,仅供参考:

本文使用的是 Vagrant + VirtualBox + MacOS 进行演示如何使用 Vagrant 来快速的安装一台 CentOS 的虚拟机。
2、演示环境
MacOS 10.15.6
Vagrant 2.2.10
VirtualBox 6.1.14
CentOS 7
VirtualBox Provider for Vagrant
正文
1、我已经安装好了 VirtualBox for MacOS 的程序
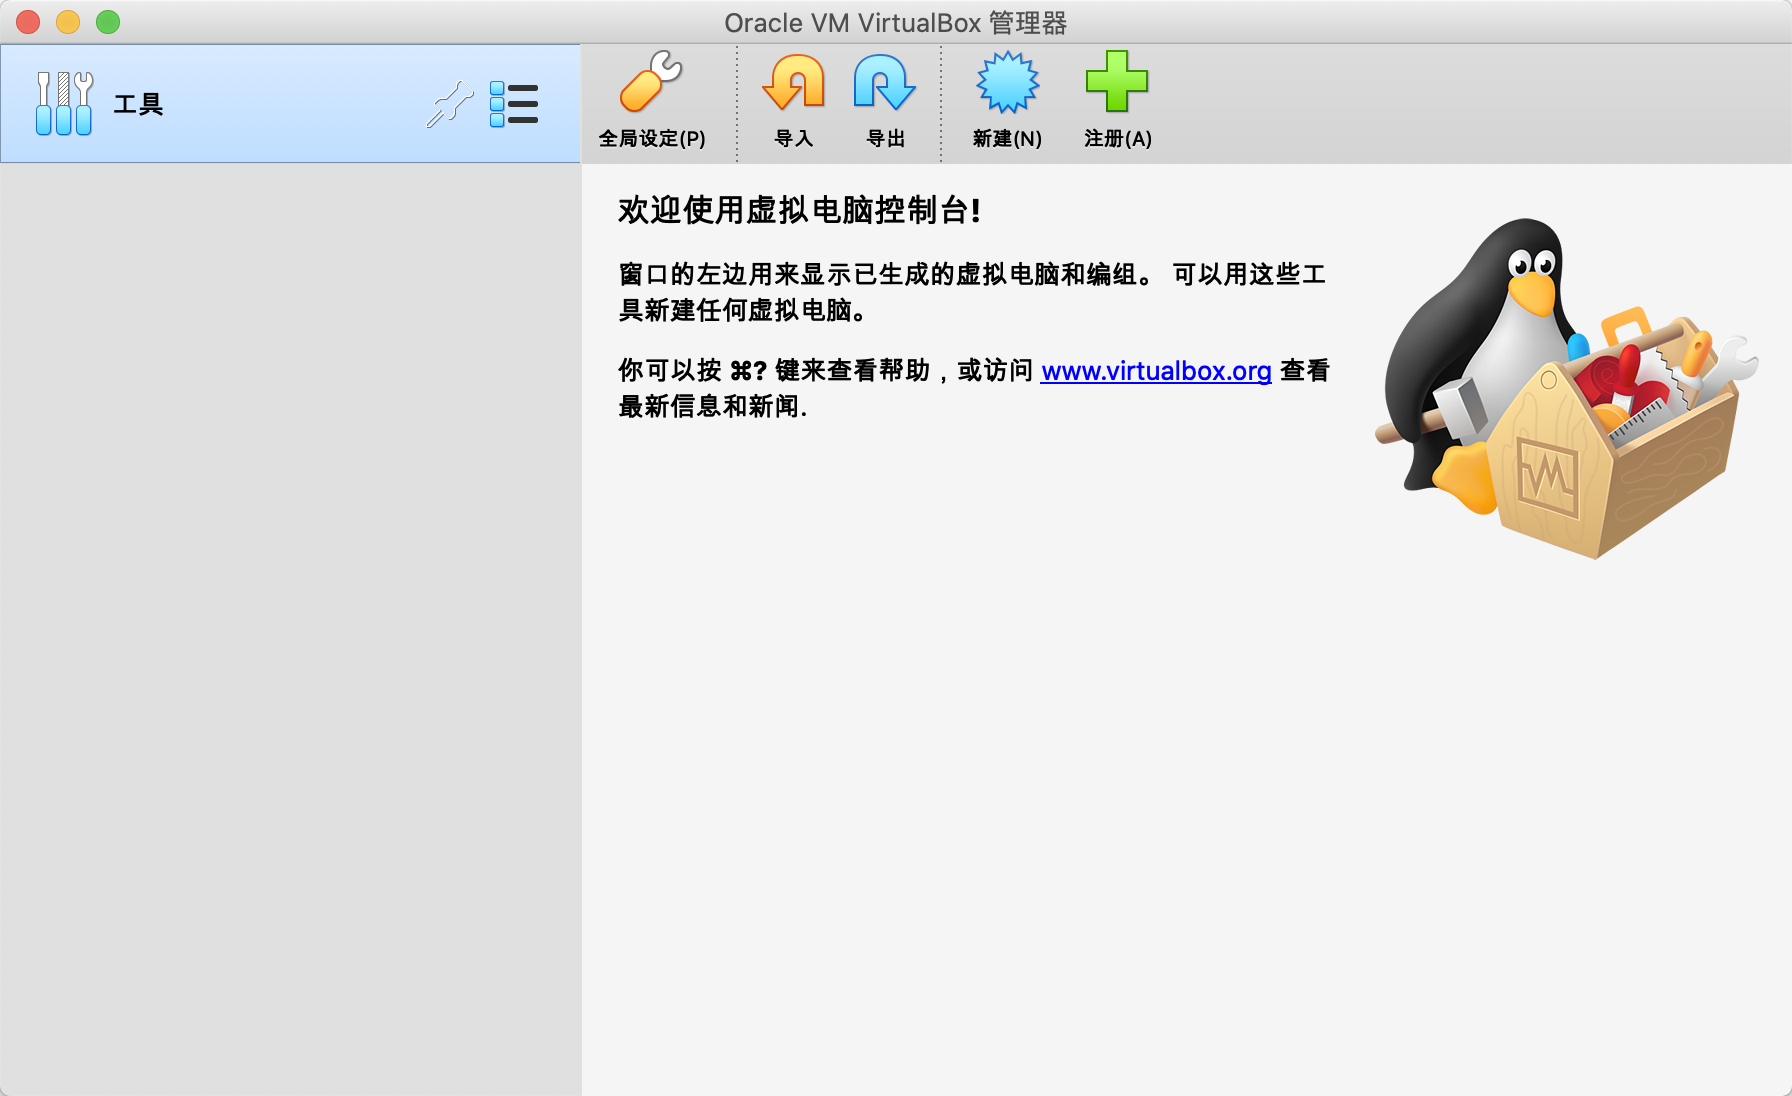
如下可以看到,我的 VirtualBox 是一个刚安装好的干净程序,还没有任何新的虚拟机。此处不赘述 VirtualBox 的安装方法,直接去官网下载对应平台的安装包一键安装即可。
https://www.virtualbox.org

2、vagrant init
执行 vagrant init centos/7 命令,vagrant 会在当前目录下创建一个 Vagrantfile 的文件,在该文件中会有 centos 相关的配置项信息。
➜  centos7 pwd
/Users/jiangzhuolin/vagrant/centos7
➜  centos7
➜  centos7 vagrant init centos/7
A `Vagrantfile` has been placed in this directory. You are now
ready to `vagrant up` your first virtual environment! Please read
the comments in the Vagrantfile as well as documentation on
`vagrantup.com` for more information on using Vagrant.
➜  centos7 ls -l
total 8
drwxr-xr-x  3 jiangzhuolin  staff    96 Sep  4 13:24 ./
drwxr-xr-x  3 jiangzhuolin  staff    96 Sep  4 13:23 ../
-rw-r--r--  1 jiangzhuolin  staff  3018 Sep  4 13:24 Vagrantfile
注:Vagrant 配置文件中默认的 provider 是 virtualbox,因此不用设置,如果是其他的 provider,则更改配置即可。
3、vagrant up
在创建的 Vagrantfile 的文件所有目录执行 vagrant up 命令,然后 vagrant 将从官网下载 CentOS7 的镜像并安装,等待下载完成即可。
注:以下执行的所有命令必须在 Vagrantfile 所在目录执行。
➜  centos7 vagrant up
Bringing machine 'default' up with 'virtualbox' provider...
==> default: Box 'centos/7' could not be found. Attempting to find and install...
    default: Box Provider: virtualbox
    default: Box Version: >= 0
==> default: Loading metadata for box 'centos/7'
    default: URL: https://vagrantcloud.com/centos/7
==> default: Adding box 'centos/7' (v2004.01) for provider: virtualbox
    default: Downloading: https://vagrantcloud.com/centos/boxes/7/versions/2004.01/providers/virtualbox.box
Download redirected to host: cloud.centos.org
Progress: 44% (Rate: 1197k/s, Estimated time remaining: 0:05:43)
从上面的输出信息可以看到 vagrant 默认使用的就是 virtualbox 的 provider,如果想使用其它的如 vmware_fusion,则使用如下命令即可,详细的用法请参考附录地址。
vagrant up --provider=vmware_fusion
运行成功
➜  centos7 vagrant up
Bringing machine 'default' up with 'virtualbox' provider...
==> default: Box 'centos/7' could not be found. Attempting to find and install...
    default: Box Provider: virtualbox
    default: Box Version: >= 0
==> default: Loading metadata for box 'centos/7'
    default: URL: https://vagrantcloud.com/centos/7
==> default: Adding box 'centos/7' (v2004.01) for provider: virtualbox
    default: Downloading: https://vagrantcloud.com/centos/boxes/7/versions/2004.01/providers/virtualbox.box
Download redirected to host: cloud.centos.org
    default: Calculating and comparing box checksum...
==> default: Successfully added box 'centos/7' (v2004.01) for 'virtualbox'!
==> default: Importing base box 'centos/7'...
==> default: Matching MAC address for NAT networking...
==> default: Checking if box 'centos/7' version '2004.01' is up to date...
==> default: Setting the name of the VM: centos7_default_1599198275246_72775
==> default: Clearing any previously set network interfaces...
==> default: Preparing network interfaces based on configuration...
    default: Adapter 1: nat
==> default: Forwarding ports...
    default: 22 (guest) => 2222 (host) (adapter 1)
==> default: Booting VM...
==> default: Waiting for machine to boot. This may take a few minutes...
    default: SSH address: 127.0.0.1:2222
    default: SSH username: vagrant
    default: SSH auth method: private key
    default:
    default: Vagrant insecure key detected. Vagrant will automatically replace
    default: this with a newly generated keypair for better security.
    default:
    default: Inserting generated public key within guest...
    default: Removing insecure key from the guest if it's present...
    default: Key inserted! Disconnecting and reconnecting using new SSH key...
==> default: Machine booted and ready!
==> default: Checking for guest additions in VM...
    default: No guest additions were detected on the base box for this VM! Guest
    default: additions are required for forwarded ports, shared folders, host only
    default: networking, and more. If SSH fails on this machine, please install
    default: the guest additions and repackage the box to continue.
    default:
    default: This is not an error message; everything may continue to work properly,
    default: in which case you may ignore this message.
==> default: Rsyncing folder: /Users/jiangzhuolin/vagrant/centos7/ => /vagrant
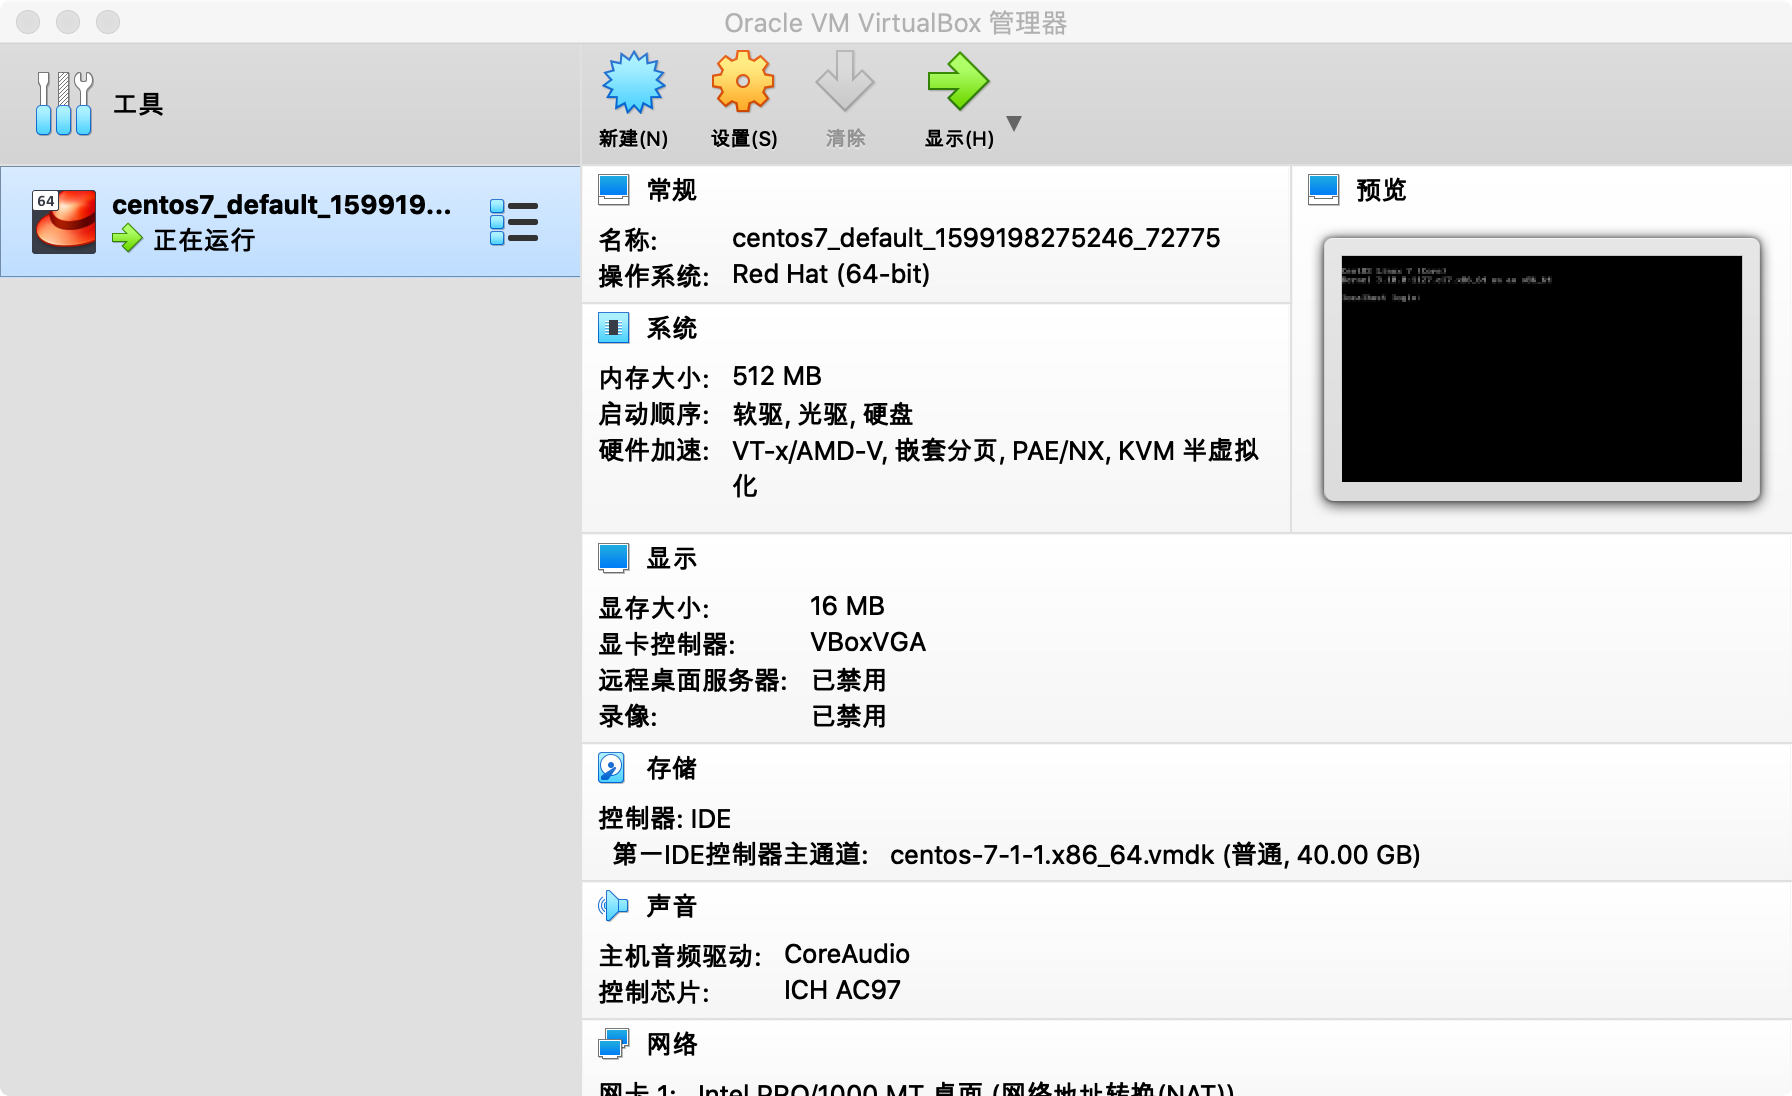
可以看到 VirtualBox 里已经显示有一台正在运行的 CentOS 7 的虚拟机了。

4、vagrant status
查看当前虚拟机的状态
➜  centos7 vagrant status
Current machine states:
default                   running (virtualbox)
The VM is running. To stop this VM, you can run `vagrant halt` to
shut it down forcefully, or you can run `vagrant suspend` to simply
suspend the virtual machine. In either case, to restart it again,
simply run `vagrant up`.
可以看到当前的 CentOS 7 正在运行状态,名称是 default。
5、vagrant halt
此命令用于强制关闭虚拟机。
➜  centos7 vagrant halt
==> default: Attempting graceful shutdown of VM...
6、vagrant suspend
挂起虚拟机,即暂停(休眠)虚拟机,虚拟机中运行的程序和状态不会丢失。
➜  centos7 vagrant suspend
==> default: Saving VM state and suspending execution...
7、启动虚拟机
当关闭或者挂机虚拟机之后,再执行 vagrant up 即可重新运行虚拟机
➜  centos7 vagrant up
Bringing machine 'default' up with 'virtualbox' provider...
==> default: Checking if box 'centos/7' version '2004.01' is up to date...
==> default: Clearing any previously set forwarded ports...
==> default: Clearing any previously set network interfaces...
==> default: Preparing network interfaces based on configuration...
    default: Adapter 1: nat
==> default: Forwarding ports...
    default: 22 (guest) => 2222 (host) (adapter 1)
==> default: Booting VM...
==> default: Waiting for machine to boot. This may take a few minutes...
    default: SSH address: 127.0.0.1:2222
    default: SSH username: vagrant
    default: SSH auth method: private key
==> default: Machine booted and ready!
==> default: Checking for guest additions in VM...
    default: No guest additions were detected on the base box for this VM! Guest
    default: additions are required for forwarded ports, shared folders, host only
    default: networking, and more. If SSH fails on this machine, please install
    default: the guest additions and repackage the box to continue.
    default:
    default: This is not an error message; everything may continue to work properly,
    default: in which case you may ignore this message.
==> default: Rsyncing folder: /Users/jiangzhuolin/vagrant/centos7/ => /vagrant
==> default: Machine already provisioned. Run `vagrant provision` or use the `--provision`
==> default: flag to force provisioning. Provisioners marked to run always will still run.
8、vagrant ssh
执行 vagrant ssh 即可进入虚拟机的内部 shell 环境
➜  centos7 vagrant ssh
[vagrant@localhost ~]$
9、退出虚拟机内部 shell
在虚拟机的内部 shell 环境直接执行 exit 命令即可退出。
[vagrant@localhost ~]$ exit
logout
Connection to 127.0.0.1 closed.
➜  centos7
结尾
就这样,使用 Vagrant 简单地运行一个虚拟环境就实现了。其实使用 Vagrant 简单地运行一个虚拟机只需要两条命令就可以了,后面介绍的几条命令是可能会用到的几个简单命令的演示。
附录
provider 的用法
https://www.vagrantup.com/docs/providers/basic_usage
https://www.vagrantup.com/docs/providers/configuration

近期评论